-->
Showing posts with label vfli. Show all posts

Tuesday, December 21, 2021

Digitization of G1206 from Piko - part 2


In my previous post, I forgot to address the issue of setting a DCC address (pun intended) to the Piko G1206 VFLI. 

Since it is a Piko decoder, it cannot be programmed by the ESU LokProgrammer. The documentation for the Piko decoder and sound module can be found here:

  • Piko 56403 SmartDecoder 4.1 - link
  • Piko 56192 SoundModule - link

I tried to use the ECoS to read the address from CV1, but it would return an error:


For the Piko decoder, it is important to use the program track:


To set the address to 744, I will use this previous post:
  • Compute CVs 17 & 18 with https://www.digitrax.com/support/cv/calculators/
  • Write CV17 = 194 and CV18 = 232 (previous values were 195 & 233)
  • Write CV 29 = 46 (previous value was 14)

With the documentation, I only need to adjust the icons as follow:


Monday, December 20, 2021

Digitization of G1206 from Piko - part 1


In a previous post, I already covered the digitalization of the G1206 from Piko, but there was no sound module. This post covers the end-to-end digitalization including the installation of that sound module and its speaker.


Analog run

Here's a short video on the engine running analog:


Installation of the decoder

It is very easy to open the engine; refer to this video. Otherwise, the notice explains it clearly:


I used Piko 56403 for the decoder and Piko 56192 for the sound module:


Here are links to the various notices:

  • Piko G1206 engine - link and link
  • Piko 56403 SmartDecoder 4.1 - link
  • Piko 56192 SoundModule - link

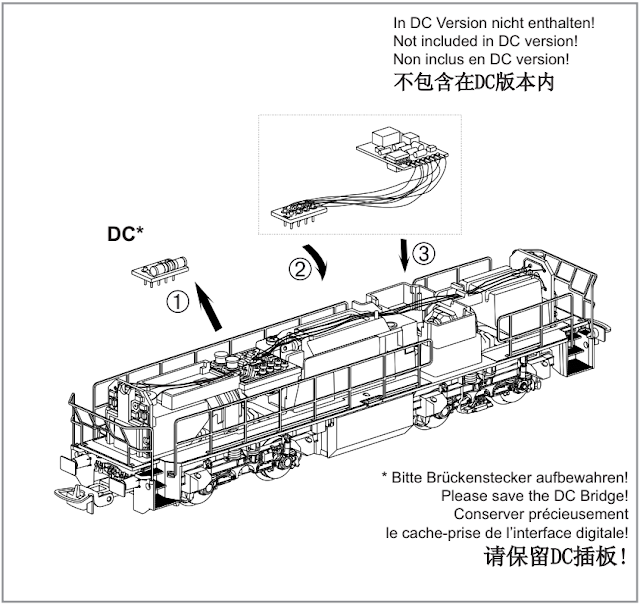
Removing the dummy decoder reveals the 8-broche NEM-652. Don't forget that the pin marked as 1 should receive the orange wire.


The notice is helpful here to know where to put the decoder:


And here's a test of the engine running in digital:


Installation of the speaker

The space for the speaker is located underneath the body. Two tiny screws need to be unscrewed: 


Two brown wires need to be passing through the inside of the engine to come to the speaker box. They can then solder to the speaker, then the screws can be repositioned:


The challenge is now to make all the wires fit into the engine. The use of electrical tape is a must here:


And finally

Here's the final outcome:


Sunday, December 19, 2021

Sunday, April 11, 2021

Digitization of BB 75022 VFLI from Rails Models Creation


Another amazing creation from Rails Models Creation; this time it is the BB 75022 VFLI:

https://lapassiondutrain.blogspot.com/2020/05/quelques-circulations-hazebrouck-du-27.html


The base is an Os.Kar 1538 model:


Even in analog, the engine is running beautifully:


I equipped this model with an ESU LokPilot V5 decoder purchased from Train Modelisme. To open the engine, there is a small screw underneath each bogie, so 4 in total:


And a final test in digital: