-->
Showing posts with label rack. Show all posts

Monday, May 31, 2021

Wiring - part 12


Another short post focusing on the wiring of the external two tracks, so I can get some trains running .....


Sunday, May 16, 2021

Wiring and more - part 11


A short post about the recent activities on the layout.


Connectors to the rack

The rack has been completed a while back, but the connectors from the rack to the layout still had to be installed. This is now done!


Switch motors

I've been focusing on making the two main tracks work. I already installed 4 switch motors a while back, so I have 9 more to install for these two tracks: 


Installing those motors is not as straightforward as I would like to. I found that pre-drilling the screwing holes and pre-installing both screws helps a lot. Once the motor's wire sticks into the switch bar, it is then easier to hold the motor in place while sliding under the table and install another two screws.


Switch motors

As part of that exercise, I am also gluing all switches and tracks down to the roadbed: 


Sunday, December 13, 2020

Closing the rack - wiring - part 10

 With all the shelves wired to the Molex connectors, I can now close the rack!


And while turned on:


Monday, November 30, 2020

Wiring - part 9

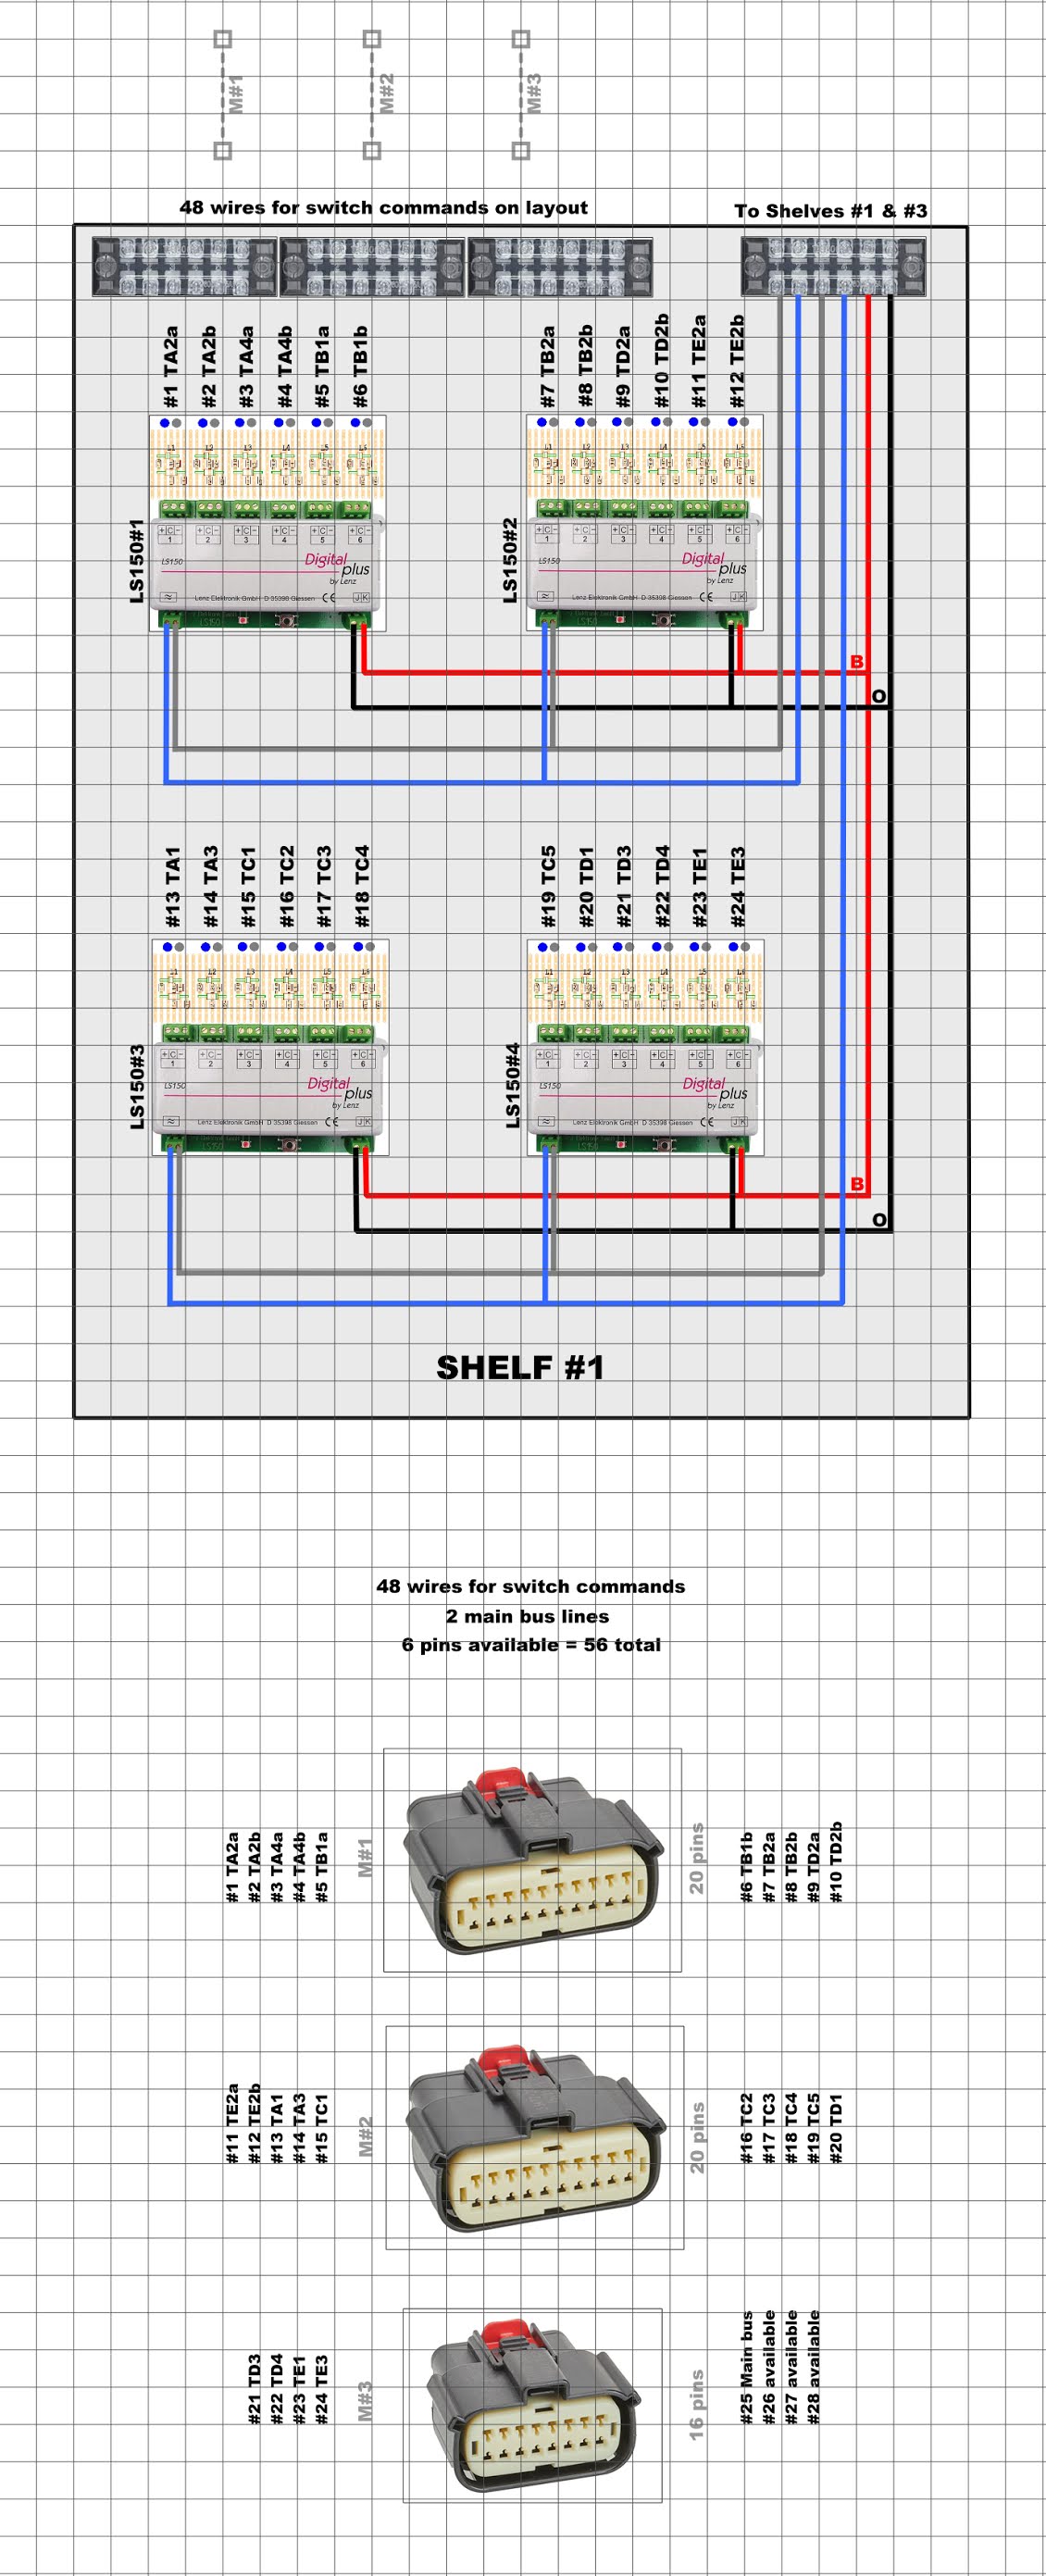
 This is the last part of wiring before closing the rack! This is for shelf #1 with the 4 Lenz LS150 that commands the switch motors.


Not much to mention here; it's the same process as before.


Sunday, November 29, 2020

Wiring - part 8

In this section, I focus on the connections between shelf #2 in the rack and the layout. I have spent a fair amount of time finding connectors that can carry the 5 Amp from the command station to the layout. I chose the MX150 connectors from Molex.


Connectors Molex MX150


Those connectors are meant for the automobile industry but will suit my needs just fine. They are available on Amazon, but also on Digi-Key and Mouser:
The instructions are pretty clear, but it takes a bit of practice to wire those things properly.

In addition to the connectors, the following supplies were needed:
  • IWISS Open Barrel Terminal Crimper on Amazon
  • 18 Gauge cable on Amazon
  • Cable tubing 1/2 inch and 3/4 inch on Amazon


Connector diagram


Here's the wiring diagram for shelf #2 to the Molex connectors:


Final result


I've tested each terminal connection from the shelf to the screwing terminal that will be positioned under the layout and everything worked as expected!


Saturday, July 25, 2020

Shelf #2 wiring - part 7

 This shelf carries the ESU ECoSDetector modules. I have the following items:
The ESU 50094 has 16 inputs for detection, but only 4 are RailCom. The ESU 50098 has 4 RailCom inputs.


Schematic


Here's what I designed on Anyrail:


Wiring


Here are these several steps with pictures:


Completion


And here's the final result:


Friday, July 17, 2020

Shelf #1 wiring - part 6

Following the wiring diagram, I wired the 4 Lenz LS150 with the terminal blocks. I initially thought that the fourth terminal block would need to be located on a side, but then I realized I could probably stack them.


Schematic


Here's what I designed on Anyrail:


Placement


I used the following supplies:

Here are these several steps with pictures:


Wiring


I used the following supplies:

Here are these several steps with pictures:


Testing


Now, all Lenz LS150 need to be configured:


Completion


And here's the final result: