As you might remember, I got several BB 27000 and BB 37000 done by Rails Models Creation. Please refer to those posts for more details. They are all based on the Mehano engines. At the time, I purchased an extra BB 27000 body that was also enhanced by Rails Models Creation.
I decided to finally use it and install it on the Mehano engine that I digitalized a while back - see here. Therefore, the BB 27155 is becoming the BB 27053.
Mehano - BB 427155


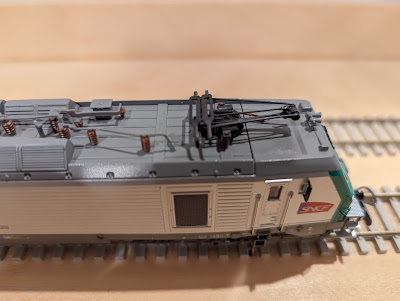
Rails Models Creation - BB 427053


This model is much more detailed with new pantographs and nicer buffer beams.
Opening the Mehano BB 427155
I will soon do a video to show how to open a BB 27000/37000 from Mehano. I've done it before here, and I'm following the exact same steps:
- Remove the 2 couplers
- Remove the 4 buffers
- Remove the 2 "chasse-pierres"
- Remove 2 small parts in the center of the engine
- Spread the sides of the body to separate it from the chassis


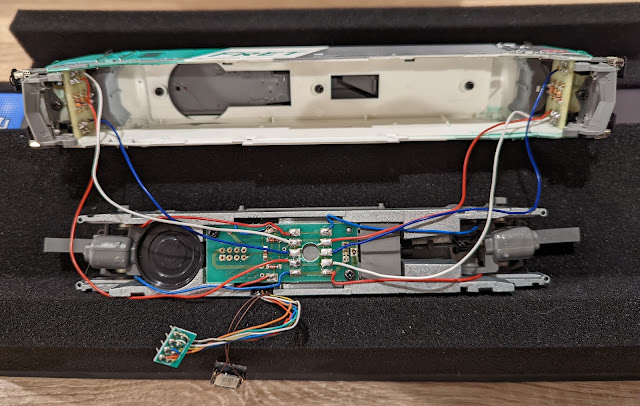
We see here that the engine is already equipped with a DCC Sound decoder and that there are no wires between the chassis and the body.
Swapping to the BB 427053
As we can see on this picture of the chassis with the new body, the main work item is the wires for the lighting. On the original model, the lighting modules are located on the chassis whereas on the new model, the lighting modules are glued into the body. We can see those red, blue, and white wires inside the new body.


Unfortunately, the wires from Mehano are all red, so it's not easy to identify their respective use:


So, I thought I would look into a finished model from Rails Models Creation:

We can see here from top to bottom: white / blue / red on the left, and red / blue / white on the right. So, let's unsolder the 3 red wires on each side from the Mehano PCB:

And then do the necessary soldering:

From there, we need to remove the Mehano lighting modules from the chassis:


And here's how it looks with the decoder and speaker in place:
Testing
As you can guess, the main test is on the lights. Luckily, it worked as expected immediately:


Finishing
From there, it is easy to put the engine back together.


And of course, we'll finish with a video: