I purchased a set of 3 passenger cars type I11 of the SNCB from LS Models with reference 43047. It's a great set as it contains the pilot car.


The pilot car can receive a decoder to control the lights. This is what I want to do, as well as adding interior lighting with figurines.


Opening the I11 pilot car
The instructions (fig 3) only indicate to take the sides of the body from the back and then lift it towards the front of the car.

It didn't come apart as easily. I used my usual method of sliding fine plastic pieces, starting around the bogies:
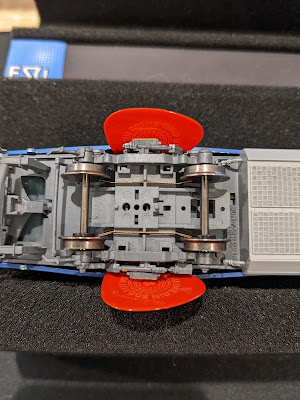


I eventually managed to open the car, but I made some small damages:
 |
| I will have to glue back those footboards |
 |
| I'm not quite sure how critical those are |
I will make a video on how to properly open this type of car, but certainly DO NOT slide the plastic cards across the entire body as I'm sure this is how I broke those tiny blue strings of plastic.

Digitizing the I11 pilot car
The instructions (fig 4) for the decoder are quite simple.
1- Remove the connector to the body:


As it turns out, ESU has decoders specifically for this type of use. They are function decoders, meaning that they cannot control a motor, but are designed to control lighting. There is a suite of such decoders: LokPilot 5 Fx

I've just ordered a couple of those. So, there will be a part 2 on this subject. Stay tuned!